
Installation procedure manual of electric butterfly valve
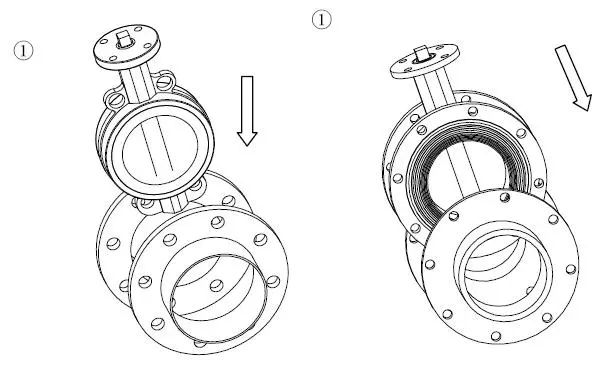
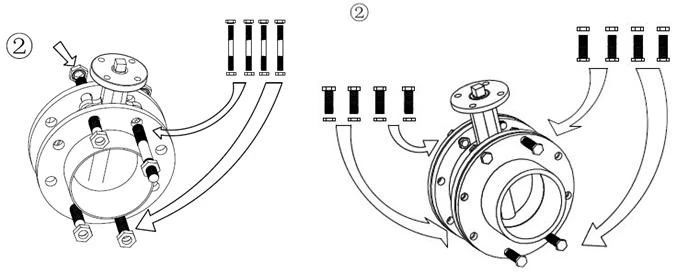
1. Place the valve between the two pre installed flanges (flange butterfly valve needs pre installed gasket position at both ends)
2. Insert the bolts and nuts at both ends into the corresponding flange holes at both ends (the gasket position of flange butterfly valve needs to be adjusted), and tighten the nuts slightly to correct the flatness of flange surface.
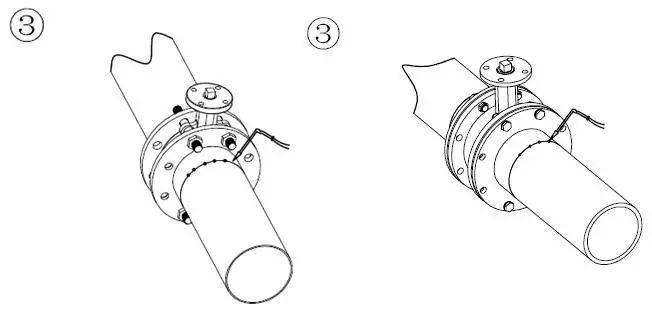
3. Fix the flange to the pipe by spot welding.
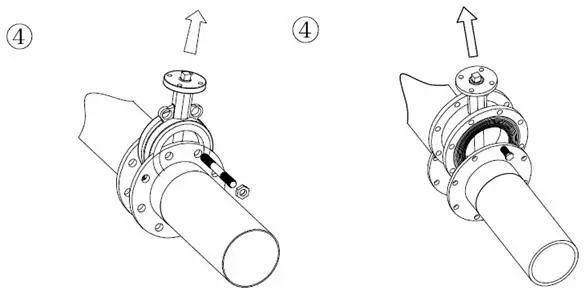
4. Remove the valve.
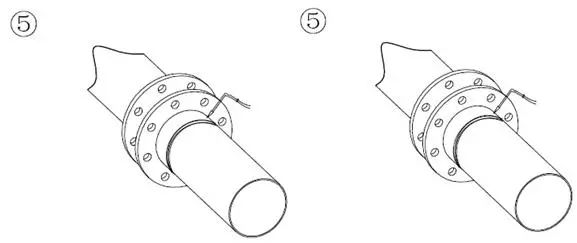
5. Weld the flange completely to the pipe.
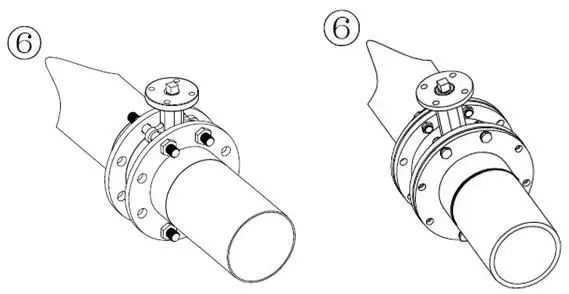
6. After the welding joint is cooled, install the valve to ensure that the valve has enough movable space in the flange to prevent the valve from being damaged, and ensure that the butterfly plate has a certain opening degree (the flange butterfly valve needs to add sealing gasket); correct the valve position and tighten all bolts (pay attention not to screw too tightly); open the valve to ensure that the valve plate can open and close freely, and then make the valve plate open slightly.
7. Tighten all nuts evenly across.
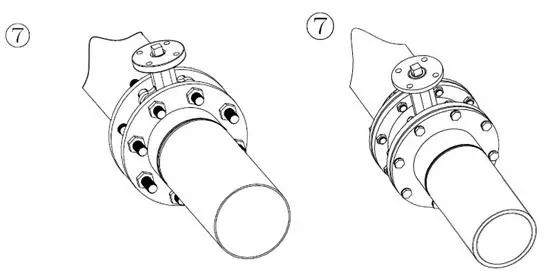
8. Make sure that the valve can open and close freely. Note: make sure the butterfly plate does not touch the pipe.
Note: the opening and closing stroke of the control mechanism has been adjusted when the electric butterfly valve leaves the factory. In order to prevent the wrong direction when the power is connected, the user should manually open to half (50%) position before connecting the power supply, and then press the electric switch to check the switch and check the opening direction of the direction valve of the indicator wheel.
Post time: Nov-19-2020


